Showing posts with label wine cork crafts. Show all posts

Saturday, February 22, 2014

Wine Cork Projects

Wine corks can transform any boring or plain object into a beautiful decorative piece! While wandering around Michael's one afternoon, I decided to pick up a few plain wood objects. One was a mirror, and the other was a small box.
For the mirror, I cut the corks in half length wise so they would lay flat on the surface. It took a while to figure out how to get them to fit because the mirror was a little too wide. I laid all the corks out first and realized there was no way to fill all the wood with  corks alone. I picked up a bag of glass marble stones ( I think that's what they are called) and used those around the inside to fill in the extra space. They worked perfectly and added a little burst of color to the mirror. I used hot glue to get everything to stay on. Just be careful hot gluing the glass marbles because they do heat up quick.
The box seemed to be made just for wine cork decoration! The cut corks fit on there pretty easily. Again, I just cut the corks in half with a razor blade and laid them out, then hot glued them into place. Just make sure you leave room for the lock so that it can be easily opened and closed.

This box was one of my favorite projects because I thought it turned out awesome & it is useful! I gave it as a Christmas present and two small bottles of wine fit perfectly in there. (The single glass bottles).

Another thing that is very simple to make is wine cork picture frames. When picking out a frame, look for ones that are flat wood so that the corks can lay flush on the surface.
I used a 4X6 frame and this project only took about 25 minutes start to finish. The longest part is cutting the corks in half. Once that is done, just lay them out to make sure they fit & then hot glue them on!
The frames are a really easy project, only require about 6 corks & also make great presents!

Saturday, February 8, 2014

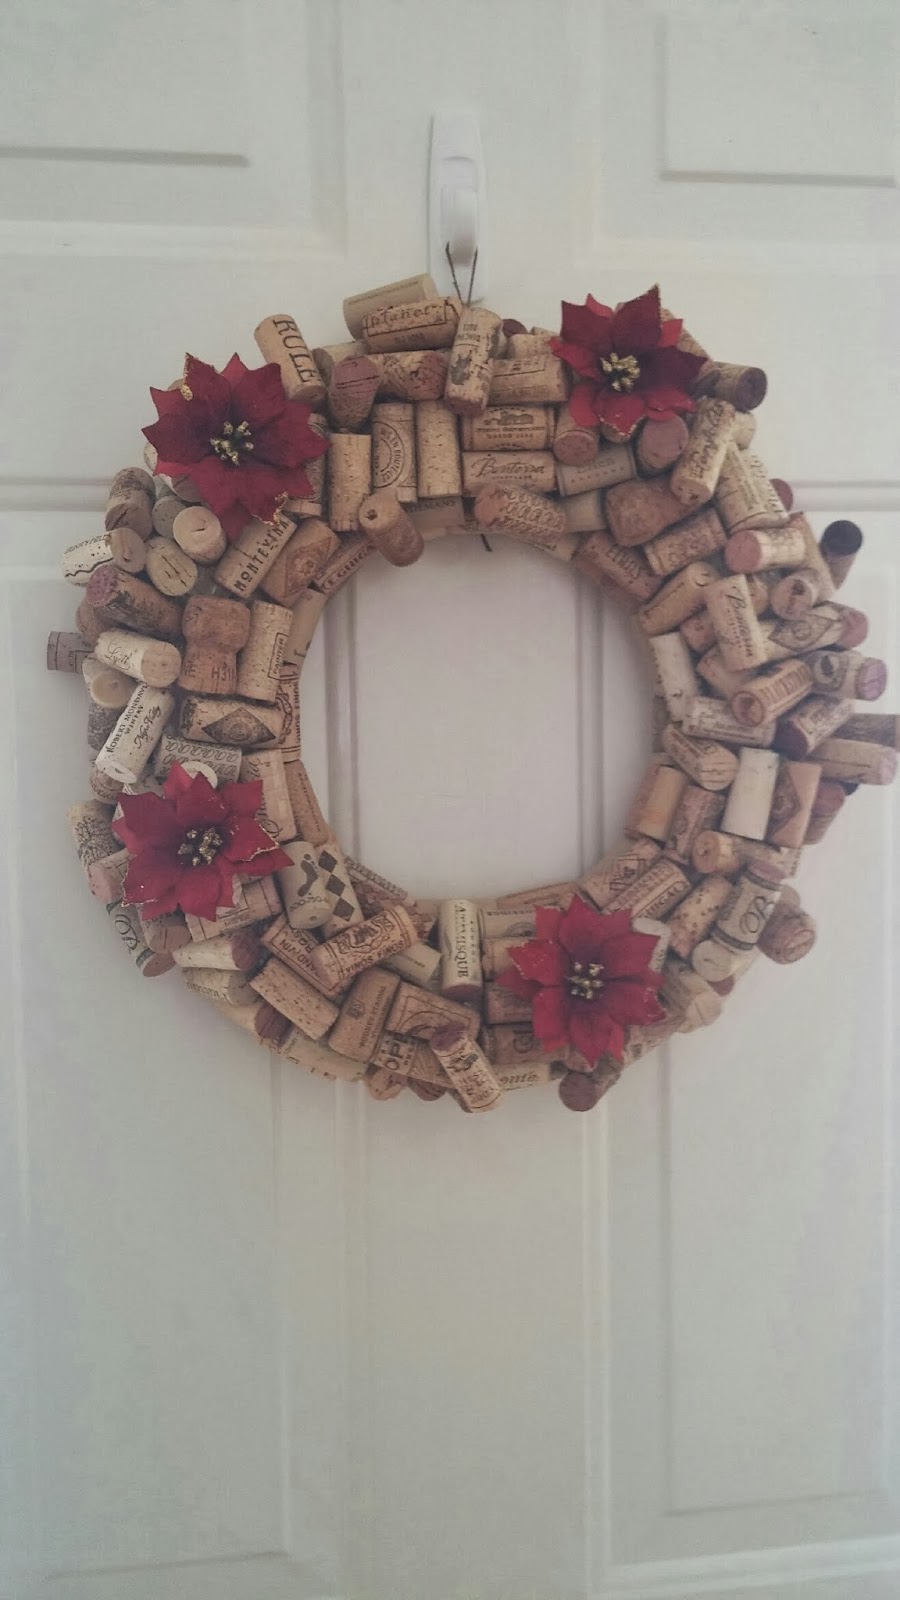
Making a Wine Cork Wreath

Wine cork wreaths are awesome because you can keep them up year round! Adding bows, flowers, ornaments, or whatever you want can keep them festive for any season. Things that you need to make the wreath are:

  • Wine corks. A lot of wine corks. (around 150ish I'd say)
  • Hot glue. (I used at least 25 mini sticks)
  • A plain straw wreath
  • String
  • Bows/flowers for decoration 
I used a straw wreath as a base, but it was a little messy. I think using a styrofoam circle as a base might be easier. You can buy these wreaths at craft stores, I think I paid around $6.
Make sure you take the plastic off of it, but do not cut the twine. Use a sturdy string and tie it around the top before you start with the corks.
I work at a seafood/ steakhouse restaurant where we sell a lot of wine. I also have friends and family save their corks for me too. ( use your resources for finding corks! make friends with a bartender & have them save their corks for you!) Since I get most of mine from the restaurant, I have a lot of  the same corks. I separated the really cool & unique ones to the side and used the more plain and repeat ones at the beginning.

I didn't take pictures as I was making this wreath, but you'll be able to see in the pictures the pattern I followed/ made up. I started on the inside of the wreath, stacking the corks on top of each other. Once I got to the top, I just started gluing like crazy in every direction just to cover up all the straw.
It is tricky trying to get them to fit nicely by each other, so just be patient and play around with it.
After I had a pretty good base layer, I added on the cool corks that I set aside earlier and placed them wherever they could be seen. I pretty much only used one layer of corks and it turned out great! Once all the corks were in place, I lightly glued some flowers in and it was ready to  be hung.
This is the finished product! Except one of the flowers is M.I.A...I didn't want to glue them in with too much glue, because I want to be able to take them out and put other decorations on. Bows, ornaments and ribbons would all look great, too! Cheers.


Saturday, January 25, 2014

Making a Wine Cork Birdhouse

One of my favorite crafts to make are wine cork birdhouses! They're easy to make and look amazing when finished. They are perfect for decorating or giving as gifts.

Things you're going to need are:

  • Wine corks
  • Hot glue gun & glue sticks
  • Wooden bird house
  • Razor blade knife or exacto knife
  • Cutting board
The wooden birdhouses can be found at your local craft store. I usually get mine from JoAnn's because they have a pretty good variety of shapes and sizes.

The razor blade knife works best when cutting the corks in half length wise. Personally, I think cutting the corks in half makes a cleaner looking finished product because it's not as bulky as using whole corks. It is also great because you don't need as many when you cut them in half! Champagne corks also look great when mixed in with regular corks. Fake corks can have really cool designs and are much easier to cut than real corks, it just depends on what type of look you want to go for.  It is important to lay the cut pieces out on each side of the house BEFORE gluing. You will find that you need to trim some corks to make them fit neatly. Once the glue dries, it is not an easy task removing the pieces.
For the birdhouse above, I left whole corks on the sides to give it a log cabin look, but used half corks for the front to keep the bulk down. As you can see toward the top you have to trim pieces to fill in the holes, doing whatever you can to make them fit! Here is a side view of the house. 
For the roof, I cut a whole cork into about 8 circle pieces and layered them into shingles. Cutting the circles in half makes for fun decorative pieces for any left over wood that is still showing. Here are a few different style bird houses.

The smaller bird house was much more difficult than the larger ones! I thought it would be a quick project but it was harder to find corks that would fit because you don't have as much room to work with. With some time and a lot of trimming, it ended up turning out cute. Just keep in mind that the bigger ones give you more room to work with.